Note: Updated to fix a couple path errors problems that I noticed. Sorry!
Note: Updated to include slipstreaming both a SP and a CU.
There’s a couple things which can be done to optimize SQL Server 2008 Standard during installation. This post makes the assumption that you have a dedicated windows server 2008 R2 domain member server in the English (1033) localization.
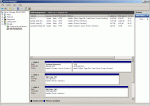
First, create 2 extra volumes on your server:
- D Drive, GPT, “SQL Data”
Size: however large your database will be) - E Drive, GPT, “SQL Logs”
Size: typically 20% the size of the SQL Data volume 
Getting all the pieces
Gather\download the following items:
- SQL Server 2008 R1 x64 Media
- Check for the version numbers of the latest Service Pack and Cumulative Update here:
SQL Server Version Database
NOTE: At the time of this post the latest version was Service Pack 2 with CU1. - Search microsoft.com and download the latest service pack and cumulative update.
Here’s a link to SQL 2008 R1 SP2. - Make sure you extract the cumulative update file right away, since it’s locked the time-limited password sent to your email address.
Preparation
- Create C:\workingtemp, and copy the SQL installation media to a new subfolder named “SQLFULL_ENU”.
- Copy the Service Pack download file here.
- Unzip the SP file to its own folder.
- Unzip the CU to it’s own folder.
- If you’re using SP2, the folder structure should look like this:
C:\workingtemp\SQLFULL_ENU\setup.exe
C:\workingtemp\SQLServer2008SP2-KB2285068-x64-ENU\setup.exe
C:\workingtemp\SQLServer2008-KB2289254-x64\setup.exe
Slipstreaming the Service Pack and CU
References:
Now that you have everything extracted and ready, let’s slipstream the Service Pack.
- Create a new folder
C:\workingtemp\SQL2008SP2CU1 (unless you’re on a different SP\CU). - Copy the contents of C:\workingtemp\SQLFULL_ENU into C:\workingtemp\SQL2008SP2CU1\.
- Next, create another new folder and copy the service pack contents to it:
C:\workingtemp\SQL2008SP2CU1\SP - Next, create a new folder and copy the cumulative update contents to it:
C:\workingtemp\SQL2008SP2CU1\CU
Once this is done, your directory structure should look like this:
- C:\workingtemp
- \SQL2008SP2CU1
- setup.exe
- \x64
- other supporting files and folders
- \SP
- setup.exe
- \x64
- other supporting files and folders
- \CU
- setup.exe
- \x64
- other supporting files and folders
- \SQL2008SP2CU1
Now, we need to overwrite a couple of the root setup files with ones from the Service Pack.
- Copy all of the files, but not the folders, and not the one file called “Microsoft.SQL.Chainer.PackageData.dll” in C:\workingtemp\SQL2008SP2CU1\SP\x64 to C:\workingtemp\SQL2008SP2CU1\x64. Here’s a robocopy command which will do this for you.
robocopy C:\workingtemp\SQL2008SP2CU1\SP\x64 C:\workingtemp\SQL2008SP2CU1\x64 /XF Microsoft.SQL.Chainer.PackageData.dll - Copy setup.exe and setup.rll from C\workingtemp\SQL2008SP2\SP to C:\workingtemp\SQL2008SP2.
- Copy all of the files, but not the folders, and not the one file called “Microsoft.SQL.Chainer.PackageData.dll” in C:\workingtemp\SQL2008SP2CU1\CU\x64 to C:\workingtemp\SQL2008SP2CU1\x64. Here’s a robocopy command which will do this for you.
robocopy C:\workingtemp\SQL2008SP2CU1\CU\x64 C:\workingtemp\SQL2008SP2CU1\x64 /XF Microsoft.SQL.Chainer.PackageData.dll - Copy setup.exe and setup.rll from C\workingtemp\SQL2008SP2CU1\CU to C:\workingtemp\SQL2008SP2CU1.
Creating the Configuration File
References:
One more thing before installing SQL–we need to create the configuration file. Open a text editor, and copy\paste the following code block, then save it as C:\workingtemp\SQL2008SP2\configurationFile.ini. Make sure to change the SQLSYSADMINACCOUNTS parameter. For a list of possible parameters and what they mean see the referenced link above.
 ;SQLSERVER2008 Configuration File

[SQLSERVER2008]

PCUSOURCE=".\SP"

CUSOURCE=".\CU"

INSTANCEID="MSSQLSERVER"

ACTION="Install"

FEATURES=SQLENGINE,FULLTEXT,RS,CONN,BC,SDK,SSMS,ADV_SSMS,SNAC_SDK

HELP="False"

INDICATEPROGRESS="False"

QUIET="False"

QUIETSIMPLE="True"

X86="False"

MEDIASOURCE="C:\workingtemp\SQL2008SP2\"

ERRORREPORTING="True"

INSTALLSHAREDDIR="C:\Program Files\Microsoft SQL Server"

INSTALLSHAREDWOWDIR="C:\Program Files (x86)\Microsoft SQL Server"

INSTANCEDIR="D:\SQLData"

SQMREPORTING="True"

INSTANCENAME="MSSQLSERVER"

AGTSVCACCOUNT="NT AUTHORITY\SYSTEM"

AGTSVCSTARTUPTYPE="Automatic"

ISSVCSTARTUPTYPE="Automatic"

ISSVCACCOUNT="NT AUTHORITY\NetworkService"

ASSVCACCOUNT="NT AUTHORITY\SYSTEM"

ASSVCSTARTUPTYPE="Automatic"

ASCOLLATION="Latin1_General_CI_AS"

ASDATADIR="D:\SQLData\MSAS10.MSSQLSERVER\OLAP\Data"

ASLOGDIR="D:\SQLData\MSAS10.MSSQLSERVER\OLAP\Log"

ASBACKUPDIR="D:\SQLData\MSAS10.MSSQLSERVER\OLAP\Backup"

ASTEMPDIR="D:\SQLData\MSAS10.MSSQLSERVER\OLAP\Temp"

ASCONFIGDIR="D:\SQLData\MSAS10.MSSQLSERVER\OLAP\Config"

ASPROVIDERMSOLAP="1"

SQLSVCSTARTUPTYPE="Automatic"

FILESTREAMLEVEL="0"

ENABLERANU="False"

SQLCOLLATION="SQL_Latin1_General_CP1_CI_AS"

SQLSVCACCOUNT="NT AUTHORITY\SYSTEM"

SQLSYSADMINACCOUNTS="DOMAIN\YourUserName" "DOMAIN\SQL Admins"

SQLUSERDBLOGDIR="E:\SQLData\MSSQL10.MSSQLSERVER\MSSQL\Data"

SQLTEMPDBLOGDIR="E:\SQLData\MSSQL10.MSSQLSERVER\MSSQL\Data"

ADDCURRENTUSERASSQLADMIN="False"

TCPENABLED="1"

NPENABLED="0"

BROWSERSVCSTARTUPTYPE="Automatic"

RSSVCACCOUNT="NT AUTHORITY\SYSTEM"

RSSVCSTARTUPTYPE="Automatic"

RSINSTALLMODE="DefaultNativeMode"

FTSVCACCOUNT="NT AUTHORITY\LOCAL SERVICE"
Installation
Now, Install SQL!
References:
- Embedding SQL Server 2008 Express in an Application
- How to install/enable .Net 3.5 SP1 on Windows Server 2008 R2 for SQL Server 2008 and SQL Server 2008 R2
- Install the .Net framework.
- Open powershell as administrator and run the following command:
Import-Module ServerManager; Add-WindowsFeature net-framework-core - Go to control panel -> Windows Updates, install Microsoft Update, and “check for updates”. Then, install them all and reboot. This should update you to .NET 4.
- Open powershell as administrator and run the following command:
- In powershell:
cd C:\workingtemp\SQL2008SP2setup.exe /CONFIGURATIONFILE="C:\workingtemp\SQL2008SP2\configurationFile.ini"- wait forever, and setup should finish
Verification
To make sure the SP and CU actually installed, you can run a file version discovery.
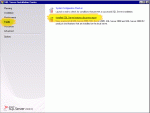
- Run setup.exe with no flags, then in the GUI click “Tools” then “Installed SQL Server features discovery report”.

- The report should output results similar to the image below. If you installed SP2 with CU1 correctly, the version number will show “10.00.4266”.

- Compare the version number listed with the table at this website: SQL Server Version Database .
- Login to the freshly installed SQL Server through “SQL Server Management Studio”. Everything should work!

Pingback: Setting Up a Single-Server SCOM Server « windowsmasher
Pingback: Install Print Manager Plus Reports Center Pro w/ Manual SQL Install | Windows Stuff That Your Dreams Dreamed Of
Pingback: SCCM 2007 Single-Server Install Process (part 1) « windowsmasher
Pingback: SCCM 2012 Dev Installation – Scripted | windowsmasher